Retro Gaming Redefined: Review and Instructions for the Elecfreaks Microbit Retro Arcade Handheld Device

The Elecfreaks Microbit Retro Arcade Handheld device is a must-have for anyone who loves coding, electronics, and retro games. With this device in your hand, you can carry around all the games you create that have the classic arcade games from the 80s and 90s look and feel, reliving the golden era of gaming while also exploring the world of electronics and coding.

This device is easy to use and perfect for anyone who wants to learn more about coding and electronics while also having some retro gaming fun. Whether you’re a seasoned programmer or just starting out, the Elecfreaks Microbit Retro Arcade Handheld is a great way to dive into the retro gaming world while also exploring the endless possibilities of coding and electronics.

Table of Contents
    Add a header to begin generating the table of contents

    First impression is a blast from the past...

    This very cool gadget not only teleports us back in time with its nostalgic arcade vibes but is also a super neat tool for introducing your young minds to the world of coding and electronics! With its integration of Microbit technology in conjunction with Microsoft MakeCode, it bridges the fun of gaming with the educational value of learning to code. 

    Microsoft MakeCode + Elecfreaks' Device + Microbit = WINNER

    To see the device in my hands and a walk through on how to connect and download your game to it, you can watch this video below.  Be sure to also download a printable set of directions and tips for using the Retro Arcade.

    You can purchase one HERE

    Visit the Elecfreaks Online Store

    Easy to follow instructions for connecting your Retro Arcade device to Microsoft MakeCode Arcade

    What is Microsoft MakeCode Arcade?

    If you haven’t explored Microsoft’s MakeCode Arcade (https://arcade.makecode.com/), I encourage you to check it out.  It is a great coding platform where you can freely build arcade games.   The website will allow you to build with coding blocks which is also known as “low code” or build with the Python or Javascript programming languages. 

    Once you do, you can then purchase a device like the Micro:bit Retro Arcade and download your games to it to play.

    You can learn more about Microsoft MakeCode Arcade in a review I did here.

    What is a Micro:bit?

    A micro:bit is like a mini-computer, but much smaller and simpler. It’s a tiny electronic board that has various components on it. Imagine it as a “brain” that you can program to do different things.

    This small circuit board is the necessary “brains” needed to power your gaming experience.   Follow my instructions or see my video below that shows how easy it is to work with this device and connect it to your game controller.

    Microbit overview
    Micro:bit Front
    Micro:bit Back

    Features of the Micro:bit

    1. LEDs: The front side has 25 little lights (LEDs) arranged in a square. You can program these to light up, create patterns, or even display messages.
    2. Buttons: There are two buttons on the front which you can press to tell the micro:bit to do something, like start a game or display a message.
    3. Sensors: It can sense movement (like tilting or shaking), and it can measure the temperature around.
    4. Pins: On the bottom edge, there are little gold pins. These can be connected to other components like Elecfreaks’ Retro Arcade Handheld device, buzzers, motors, or lights, allowing the micro:bit to control them.
    5. Connectivity: The micro:bit can communicate wirelessly with other devices, including other micro:bits!

    How to Assemble and Use the Micro:Bit Retro Arcade Controller

    Unboxing

    The Micro:bit Retro Arcade comes in a small plastic container that includes:

    • two acrylic game controller forms with paper coating
    • six button covers
    • 4 small plastic cylinders
    • the LCD screen with clear plastic protective cover that is removable
    • controller circuit card
    • AAA battery placement holder
    • screws, nuts, and a small Philips head screw driver

      NOTE: You do not need to purchase any additional tools.

    The Micro:bit circuit board, which was purchased separately, came in a small anti static bag.

    HEADS UP:  Removing the paper coating of the acrylic controllers is a bit tedious.  Also be mindful of the LCD screen which is connected to one of the acrylic controller forms.  It should remain connected.

    Elecfreaks Microbit Retro Arcade Unboxed

    Assembling

    After removing the paper coating of the acrylic (be patient), the trickiest part in assembling the controller is when you have to line up the plastic cylinder with the screw so that you can then place the second acrylic piece and secure it with the provided nut.

    ADVICE: Insert a screw through the acrylic top panel and place a small piece of scotch tape over the head of the screw to hold it in place.  Do this for each screw.  Turn over the piece and place the cyclinder.  Then place the final acrylic piece and put the nut on the screw.

    Press the yellow button covers onto the four directions buttons on the left side and two over the A-B buttons on the right.

    Insert 3 AAA batteries into the battery holder on the backside of the controller.

    GetMeCoding Assembling the Microbit Retro Arcade controller

    Once assembled, you can now insert your Micro:bit into the slot at the top of the Retro Arcade Controller.

    NOTE: When handling the Micro:bit be sure to hold it around its edges to avoid damaging any of the electronic parts.


    Elecfreaks Microbit

    Connecting to Your Computer

    There are several ways to connect your Retro Arcade Controller to your computing device. 

    • Micro USB cable
    • Bluetooth

    I use a used a micro USB cable and inserted it to the Micro:bit.  This now allows me to download games that I built in Microsoft MakeCode Arcade to the controller.

    Elecfreaks Micro:bit Retro Arcade Controller connected to PC

    Downloading to Your Micro:bit Retro Arcade Controller

    At the time of this blog post, the Elecfreaks Micro:bit Retro Arcade Controller was not a listed hardware device.  Follow these steps to download your game code and push it to your controller.

    Watch the full video below or follow the steps.

    1. Login with your Microsoft MakeCode Arcade Account.
    2. Click the gear in the upper right corner, select ABOUT.
    3. A popup will appear, select EXPERIMENTS
    4. Click EXPERIMENTAL HARDWARE.  This will now enable it as an option in Microsoft MakeCode Arcade.
    5. Return the MakeCode Arcade.
    6. Click the three dots next to DOWNLOAD.
    7. Click CHOOSE HARDWARE.
    8. Select N3.
    9. This will now make it possible to download what you built as a game file.
    10. You will get a file in .hex format, drag it into the MICROBIT drive to run it on micro:bit V2 + Microbit Retro Arcade.

    I really had fun exploring the Retro and I arrived at some PROS and CONS to help you choose if this is a device you can use either on your own or with your students.

    The Pros

    Bite-Sized Coding

    The device uses the Micro:bit technology which is known for its user-friendliness and a plethora of online resources for beginners. Blockly and Python, its supported languages, provide a wonderful stepping stone into the coding world! 

    Tinkering Galore

    For all the DIY wizards out there, this device provides ample opportunities to get hands-on with electronics, as you assemble the parts of the device.  There is no need to solder any electronics. 

    Portability

    Compact and mobile, it enables learning and gaming on the go. Who said you can’t have your own little arcade in your pocket? 

    Affordable Learning

    Unlike many tech learning tools, it’s relatively affordable, making it an accessible starting point for many families and educational settings.  Check out the PRICE here for the device with the Micro:bit board.

    While the Microbit Retro Arcade is jam-packed with fun and learning, it’s only fair we talk about the spots where it could do better. 

    The Cons

    Screen Size:

    The petite screen might be a bit of a squinty affair for some and limit the complexity of the games you can create. 

    Battery Life

    The device requires 3 AA batteries that should be fine for a short while. 

    Learning Curve

    While the Micro:bit platform is beginner-friendly, younger kids might still need a fair bit of guidance to get started with their first coding projects. They will be required to connect to a computing device where they will be creating their game code.

    At the time of this blog post, on Windows based computers, you had to connect to the device via a USB cable and copy a file.  A great experience for young developers but it can be challenging.  See the download and video for tips.

    Feel of the Device

    Assembling the device may challenge some younger tinkerers but if they have an adult nearby for assistance, that would be helpful.  Also, the device has an edge to it.  It isn’t sharp but it is not rounded like traditional video game controllers.

    Summing it up and a recommendation...

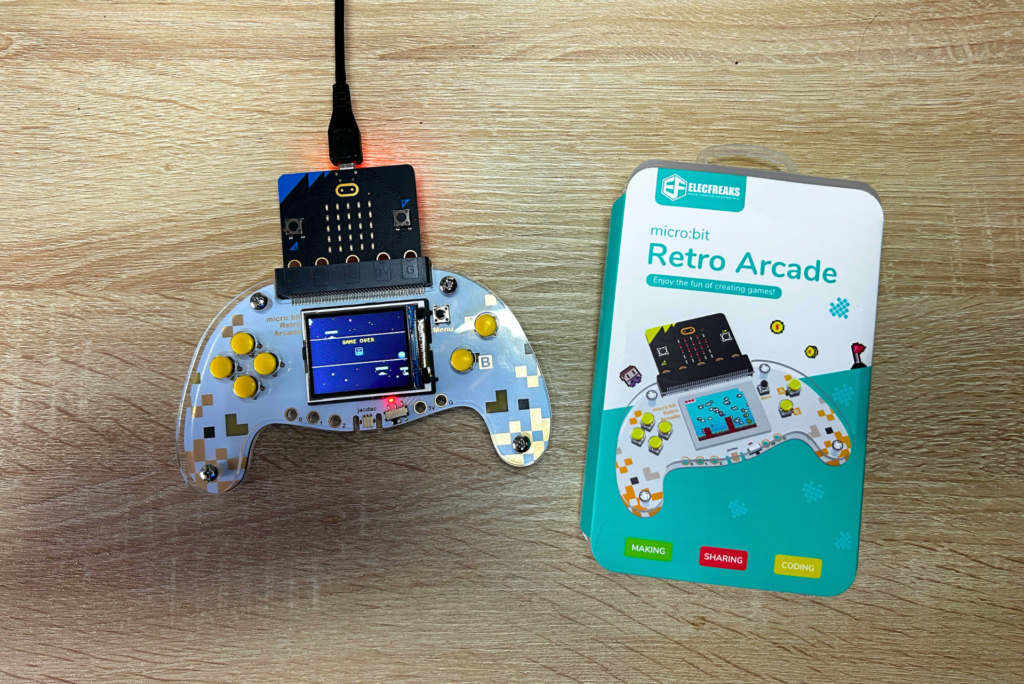
    In the grand scheme, the Elecfreaks Microbit Retro Arcade Handheld brings a fabulous, nostalgia-twinged exploration of coding and electronics, neatly fitting into our little ones’ palms. It’s a hearty thumbs up from me for anyone looking to merge the joy of gaming with the skills of tomorrow! 

    And don’t forget, my coding champions: Every step in learning, be it through a compact retro arcade or a hefty coding book, brings you closer to becoming the tech wizards of tomorrow!


    Stay curious and keep coding!!

    GetMeCoding.com Mr Fred

    Mr. Fred

    Start Coding Today In 5 Minutes!

    Get Me Coding Free Activity

    Take 5 minutes and try a FREE coding activity!

    Let Me Help You

    GetMeCoding Mentoring

    If you are a teacher or someone looking to help others learn to code, let me help you.

    Scroll to Top

    it only takes

    5 Minutes and 22 Seconds